

Run the correct auto-clean cycle after a short manual prep: pull the racks, clear the drain, and let the machine work at the intensity the soil level demands. Only use manufacturer-approved tablets or cartridges — Light, Medium or Heavy — and never a household caustic, since these damage sensors and gaskets and can void the warranty outright. Superiorkitchenequipment’s Convotherm and Rational ranges are built for exactly this cycle discipline.
TL;DR:
- Using manufacturer-approved cleaning cycles and avoiding household caustics prevents damage to sensors and gaskets, ensuring the oven’s longevity.
- Weekly manual cleaning of fan guards, behind panels, and door glass is essential to prevent airflow issues and uneven cooking results.
- Regular descaling based on water hardness and replacing filters reduces scale buildup that can cause generator failure over time.
- Fault codes often originate from blocked drains, exhausted filters, or scale, and quick checks can often resolve issues without a technician.
- Adhering to a strict daily, weekly, monthly, and annual maintenance schedule preserves warranty coverage and maximizes energy efficiency.
Table of Contents
- What is the correct daily combi oven cleaning routine?
- How do the light, medium and heavy self-clean cycles differ?
- How do you deep clean a combi oven manually each week?
- Why does descaling protect the steam generator?
- What do common cleaning-related fault codes actually mean?
- How often should you schedule combi oven maintenance?
- Which chemicals and habits should you avoid entirely?
- Why disciplined cleaning protects your equipment investment
- Which combi oven suits a kitchen that takes cleaning seriously?
- Where to check model-specific cleaning instructions
- Sources
What is the correct daily combi oven cleaning routine?
A disciplined end-of-service routine is what separates an oven that lasts a decade from one that needs an engineer visit every quarter. Manufacturers recommend a layered hygiene programme: daily cleaning, a scheduled auto-clean cycle, and periodic deep cleaning on top. Skip the daily layer and the weekly deep clean gets harder every time.
Start with cool-down. Never begin cleaning above 80°C — thermal shock on a hot glass door or gasket causes cracking and premature seal failure, and hot detergent residue can flash off unpredictably.
- Let the cavity cool to a safe working temperature, then remove all racks and trays.
- Clear loose debris and food particles from the cavity floor and drain channel by hand.
- Check that the drain runs freely, the detergent cartridge or tablet dispenser is stocked, and the water supply is on.
- Select and start the appropriate self-clean cycle for that day’s soiling.
- Wash racks and trolleys, either dishwasher-safe or by hand, and dry fully before reloading.
- Wipe the door glass and run a quick visual check on the gasket for cracking or debris.
If a cycle fails partway through, check three things in order: is the cartridge empty, is the water supply interrupted, and is the drain blocked. Most failed cycles trace back to one of those three.
Pro Tip: A short steam-only burst before you load detergent softens carbonised grease first, so the auto-clean cycle finishes faster and the finished cavity comes out noticeably cleaner.
How do the light, medium and heavy self-clean cycles differ?
Most combi ovens on the market today offer three self-clean intensities, and picking the wrong one is the single most common reason kitchens end up re-running a cycle. Each level scales the detergent dose, rinse count and dry phase to match how dirty the cavity actually is, and each can run unattended overnight once the pre-checks pass, according to Commercial Kitchen Store’s cleaning guide.
- Light — a quick rinse cycle, roughly 30 to 60 minutes, suited to a lightly used oven at the end of a quiet service.
- Medium — 60 to 120 minutes, the standard choice after a full day of roasting, steaming and combi cooking.
- Heavy — 2 to 4 hours, reserved for heavy carbon buildup, burnt sugar residue, or a cavity that has gone a few days without a proper clean.
Before you press start on any cycle: confirm the drain is clear, the water supply is live, a detergent cartridge is loaded, and the door is fully latched. An empty cartridge or an interrupted cycle overnight leaves a half-cleaned cavity and a fault code waiting for the morning shift.
How do you deep clean a combi oven manually each week?
Auto-clean handles the cavity walls and floor, but it does not reach the fan guard, the space behind it, or the gap between removable door panes. Those areas need a hands-on weekly pass, and skipping it is exactly where uneven browning and airflow complaints start.
- Let the oven cool fully and isolate power before opening any guard.
- Remove the fan guard, usually secured with a single central nut or quick-release fastener, and inspect behind it.
- Clean the carbonised grease build-up behind the fan blade with a soft nylon brush, since this is the single most common cause of poor air circulation and uneven browning.
- Remove racks and trolleys for a separate wash cycle or hand clean.
- If the door panes separate, clean the inner glass surfaces where steam residue collects.
- Wipe gaskets by hand with a damp cloth, checking for splits or hardening as you go.
- Reassemble the fan guard and door, and run a short test cycle before service resumes.
Wear heat-resistant gloves and eye protection throughout, and keep a soft nylon brush and a plastic spatula on hand for stubborn spots. Never use a metal scraper or a pressure hose inside the cavity; both scratch stainless steel and can force water into electrical housings.
Pro Tip: Photograph the fan guard fixings before you remove them the first time. It saves real time on reassembly, especially if two different staff members handle the deep clean on alternating weeks.
Why does descaling protect the steam generator?
Scale is the single biggest threat to a combi oven’s long-term health, and it fails quietly. Mineral deposits from hard water build up inside the steam generator, throw off temperature and humidity sensors, and eventually cause outright generator failure if left unchecked.
- Set your descaling frequency by local water hardness, not by a fixed calendar date; harder water means more frequent cycles.
- Fit upstream filtration or a softener where hardness is high; this single step reduces how often you need to descale.
- Place descaling cartridges in the designated dosing point only. Never pour descaling solution directly down the cavity drain.
- Replace water filters on the interval your manufacturer specifies, and log the change date every time.
Preventative maintenance, particularly water treatment and filter replacement, is repeatedly flagged as the highest-impact factor in avoiding faults that get mistaken for hardware failure, according to Total Food’s preventive maintenance guide. A filter swapped on schedule is far cheaper than a steam generator replaced early.
What do common cleaning-related fault codes actually mean?
Most fault codes and performance drops that look like a broken oven are actually maintenance issues wearing a disguise. Error codes and sluggish performance frequently trace back to blocked drains, exhausted filters, or scale in the steam generator rather than a failed component.
- Water pooling in the cavity usually means a blocked drain channel; clear it manually before running another cycle.
- Uneven browning points to the fan guard or restricted airflow; check for grease build-up behind the blade.
- Failed clean cycle typically means an empty detergent cartridge, a blocked drain, or an interrupted water supply.
- Persistent “descale required” warning often follows an interrupted descale cycle or the wrong cartridge type being fitted.
Before calling an engineer, check the cartridge level, confirm water pressure, and inspect the drain by hand. Log the exact error code, the time it appeared, and the last cleaning cycle run. That single log entry can save a technician a wasted diagnostic visit.
How often should you schedule combi oven maintenance?
A written schedule turns cleaning from a habit into evidence, and evidence is what protects your warranty when something does go wrong. The standard cadence manufacturers recommend runs across four tiers, with daily and weekly checks forming the backbone of the whole programme.
- Daily — cool-down check, drain clearance, and the correct self-clean cycle.
- Weekly — manual fan guard and gasket deep clean, plus a door seal inspection.
- Monthly — filter status check and descaler cartridge review.
- Annually — a full engineer service covering the steam generator and internal components.
| Frequency | Task | Logged by |
|---|---|---|
| Daily | Cool, clear drain, run self-clean cycle | Kitchen operator |
| Weekly | Fan guard, gasket and door seal inspection | Maintenance staff |
| Monthly | Filter check, descaler cartridge review | Maintenance staff |
| Annual | Full engineer service | Service technician |
A simple log line, date, operator, cycle used, cartridge or filter changes, and any unusual observations or error codes, materially speeds up engineer diagnosis and gives you documented proof for warranty claims. It also strengthens grant applications tied to energy-efficient equipment, since assessors want to see the appliance is being run and maintained as specified.
Which chemicals and habits should you avoid entirely?
Getting cleaning products wrong is one of the fastest ways to void a warranty on equipment that otherwise runs for years. Some substances and tools are flatly unsuitable for the inside of a combi oven cavity, regardless of how well they clean a domestic hob.
- Never use household caustic cleaners, bleach or chloride-based products inside the cavity; they corrode stainless steel and attack seals.
- Avoid DIY acidic descalers unless your manufacturer specifically approves them for that model.
- Keep abrasive scouring pads and metal scrapers away from cavity surfaces, since both scratch stainless steel and damage sensors.
- Never use a pressure hose for internal cleaning; forced water reaches electrical housings a cloth never would.
Wear PPE (gloves, eye protection) throughout, keep safety data sheets accessible for every chemical stored on site, and clean touchscreens and probes with a soft, slightly damp cloth only.
Pro Tip: Store descaling cartridges and cleaning tablets away from food storage areas, clearly labelled, and dispose of spent cartridges per your local waste regulations rather than down a kitchen drain.
Why disciplined cleaning protects your equipment investment
Energy-efficient combi ovens carry real upfront savings, but those savings only hold if the machine keeps running efficiently. A steam generator clogged with scale burns more energy per cycle, and a blocked drain shortens the working life of seals that are expensive to replace. Routine cleaning is what protects the numbers you bought the oven for in the first place.
If you’re unsure which cycle intensity or descaling schedule suits your specific model, our showroom and service team can walk you through it. Model-specific training takes the guesswork out of the routine entirely.
— David
Which combi oven suits a kitchen that takes cleaning seriously?
A combi oven that is easy to strip down, dose correctly and log consistently saves far more over its lifetime than one bought on price alone. The Convotherm Combi Oven 10 Trays is built around exactly that logic, with a removable fan guard and cleaning-management scheduling that makes the daily and weekly routine genuinely fast to run.
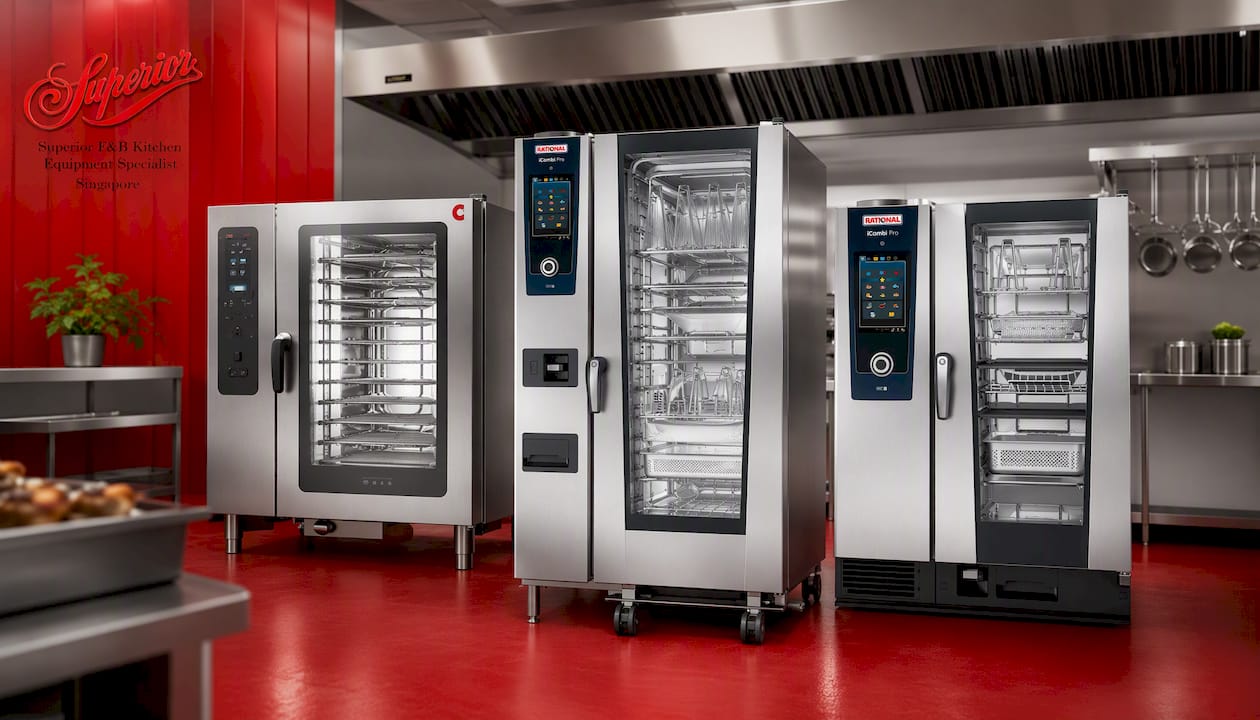
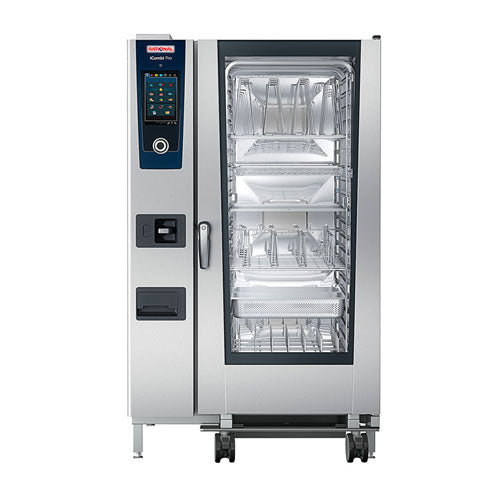
For kitchens running higher volume, the Rational iCombi Pro 20 Tray Combi Oven handles heavier daily loads without extending your deep-clean time much beyond a smaller unit, while the Rational iCombi Pro 10 Tray Combi Oven suits a tighter footprint without giving up serviceability. All three qualify under current energy-efficiency grant schemes, which can offset a significant share of the purchase cost while cutting electricity bills on top. Visit the Superiorkitchenequipment showroom to see the cleaning cycle controls in person, or request a quote on the 20-tray model or the 10-tray model to see specifications matched against your kitchen’s volume.
Where to check model-specific cleaning instructions
For steps tailored to your exact model, always start with the manufacturer’s own documentation rather than a general guide.
- Convotherm Cleaning Management — official detail on SteamDisinfect, the Cleaning Scheduler and contactless operation.
- Combi oven maintenance checklist — a practical breakdown of daily, weekly and monthly tasks.
- Preventive maintenance guide for commercial combi ovens — background on how neglected maintenance masquerades as hardware failure.
- Partstown resource centre — a useful reference on chemicals and tools to avoid entirely.
Sources
- Combi oven maintenance checklist | Industry Kitchens
- How to clean a combi oven | Commercial Kitchen Store
- Cleaning Management | Convotherm
- Guide: preventive maintenance commercial combi ovens | Total Food