

Deep fryer maintenance comes down to three routines and one rule: skim and filter oil daily, drain and clean weekly, boil out monthly, and never touch hot oil until it has cooled with the unit powered down. Skip any of the three and you shorten oil life, raise energy use, and invite the kind of breakdown that shuts a line mid-service. Superior Kitchen Equipment builds this discipline into fryer models designed for easier daily upkeep, which matters as much as the schedule itself.
TL;DR:
- Skimming debris, filtering oil, and cleaning the fryer weekly prolong oil life and prevent breakdowns, especially in high-breaded or high-protein menus.
- Oil should be fully replaced once it shows bad odor, persistent foaming, rapid darkening, or heavy smoking, not just filtered during service.
- Monthly boil-outs are essential for removing baked-on carbon, requiring safe shutdown, thorough cleaning, and proper drying to avoid safety hazards.
- Regular safety practices include cooling oil before cleaning, using rated containers, and maintaining ventilation to prevent fire risks and injuries.
- Using maintenance-friendly fryer models and keeping detailed logs can reduce long-term costs and improve equipment longevity.
Table of Contents
- Building a daily, weekly and monthly deep fryer maintenance schedule
- How do you know when fryer oil needs changing?
- What is the correct boil-out procedure for a deep fryer?
- What safety steps prevent fryer accidents?
- Why is my deep fryer not heating properly?
- Why preventative fryer maintenance pays for itself
- Quick deep fryer maintenance checklist
- An operations manager’s take on fryer upkeep
- Fryers built for easier maintenance
- Sources
Building a daily, weekly and monthly deep fryer maintenance schedule
A fryer that runs eight hours a day accumulates carbon and food particles fast, and the tasks that catch this early take minutes, not hours. Structuring the work by cadence, rather than treating cleaning as one big weekend job, is what separates kitchens that get years out of a fryer from those replacing units every eighteen months.
Daily tasks carry the most weight because oil degrades continuously during service:
- Skim floating debris between batches, not just at close
- Filter the oil at least once, ideally at end of day, to strip out crumbs before they carbonise
- Wipe down exteriors and check for grease build-up around the control panel
- Check oil level and note how quickly the unit recovers temperature after a load drops
Weekly tasks go beyond what happens during service:
- Drain oil fully to inspect the vat interior for scale or sediment
- Clean crumb trays, filter screens and nearby extraction vents
- Inspect the drain valve for leaks and verify thermostat accuracy against a probe thermometer
Monthly tasks address what daily skimming can never reach:
- Run a full boil-out to strip carbonised grease from the vat walls and elements
- Check gas connections, electrical terminals and high-limit safety switches
- Deep-clean the hood and ventilation directly above the fryer, where airborne grease settles fastest
Kitchens running heavy-breaded items or high-protein menus, think fried chicken, tempura, or battered fish, should tighten this schedule. Breading sheds more particulate into the oil, and protein exudes moisture that accelerates breakdown, so filtering twice daily and moving the boil-out to a three-week cycle is common practice in high-throughput operations. This structured cadence of skimming, filtering and boiling out is standard across restaurant equipment maintenance guidance, and it’s the backbone of every other section in this guide.
How do you know when fryer oil needs changing?
Skimming, filtration and full oil changes are three different jobs, and confusing them is the single biggest reason kitchens burn through oil faster than they need to. Skimming removes loose debris floating on the surface during service. Filtration pulls oil through a fine medium, paper, cloth, or a fixed metal mesh, to strip out suspended particles you can’t see. A full oil change replaces the batch entirely once it’s degraded beyond what filtration can fix.
Filter oil when it’s warm but not scalding, generally between 90°C and 110°C, since oil that’s too hot is a burn hazard and oil that’s too cold filters poorly and clogs media faster. Cartridge filters and gravity-fed filtration carts are common in commercial kitchens, and pairing daily filtration with weekly full drains is widely recommended practice for extending oil life without over-filtering fresh oil unnecessarily.
Watch for these objective signals that oil needs full replacement, not just filtering:
- A sharp, rancid or “fishy” smell, even when frying neutral items
- Persistent foaming that doesn’t settle after a load is removed
- Rapid darkening within a single day rather than over several days
- A noticeably off taste in fried product that customers or staff notice
- Heavy smoking at normal frying temperature, well before the oil’s rated smoke point
Menu composition changes everything here. Battered items and blanching runs shed starch and moisture into the oil fast, while high-protein foods like chicken and fish accelerate breakdown through fat and protein residue. A fryer running mostly battered fish and chips will need filtration far more often than one frying plain potato chips.
Pro Tip: Keep a simple oil log next to the fryer. Note the date of each filtration and jot a one-word colour description. Patterns that take weeks to notice by memory jump out instantly on paper.
What is the correct boil-out procedure for a deep fryer?
Filtration removes particles, but only a boil-out dissolves the baked-on carbon layer that clings to vat walls and heating elements. This is the deep clean that daily and weekly tasks can’t replace, and it needs to happen roughly monthly, or every three weeks under heavy use.
Before starting, run through a pre-clean checklist: power down the unit completely, allow the oil to cool to a safe handling temperature, put on heat-resistant gloves and eye protection, and isolate the gas supply or unplug the electrical connection.
- Drain the oil into a proper heat-rated container, filtering it first if it’s still usable, or into a designated waste container if it’s due for disposal.
- Remove baskets and accessories and soak them separately in hot water with degreaser.
- Scrape loose carbon from the vat interior, then apply an approved commercial fryer boil-out solution or degreaser rated for food-contact surfaces.
- Simmer the boil-out solution in the vat for 20 to 30 minutes, which is the standard window for loosening stubborn carbon deposits without damaging the vat lining.
- Rinse thoroughly and dry completely before refilling with fresh oil. Any residual moisture left in the vat will cause violent spattering the moment hot oil hits it.
Use only cleaners labelled safe for stainless steel fryer vats; avoid abrasive scourers or chlorine-based products that pit the surface and create hiding spots for future carbon. Used oil should go to a licensed rendering or recycling collector, never down a drain, both to avoid blocked plumbing and because most municipalities regulate fats, oils and grease disposal.
Fixed heating elements are not a DIY removal job. If carbon has built up around a sealed element or a wiring connection looks compromised, that’s a technician’s task, not a boil-out day task.
Pro Tip: Never rush the drying step to save time before the next shift. A few extra minutes with a clean towel is far cheaper than an oil spatter injury or a scorched batch from steam pockets.
What safety steps prevent fryer accidents?
Hot oil and water are the most dangerous combination in a commercial kitchen, and the rule is absolute: never add water, or anything wet, to hot oil. Even trace moisture from an incompletely dried basket causes violent spattering that can burn staff standing several feet away.
- Cool oil to a safe handling temperature and fully power down before any cleaning or draining
- Wear heat-resistant gloves, safety goggles and a full apron during drain, boil-out and filtration
- Transfer oil only into containers rated for hot liquids, never standard plastic buckets
- Dry every surface completely, vat, baskets, lids, before refilling or reheating
Grease fires need a Class K or Class B extinguisher, never water, which spreads burning oil explosively. Evacuate the immediate area and cut power before engaging the extinguisher if it’s safe to do so.
Ventilation matters more than most operators assume. A hood that’s clogged with grease reduces airflow around the fryer, which traps heat, slows recovery, and raises the ambient fire risk in the whole cooking line. Monthly hood checks aren’t optional extras. They’re part of the same safety system as PPE and cooling procedures.
Why is my deep fryer not heating properly?
Most fryer complaints trace back to a handful of repeat offenders, and knowing which ones staff can fix versus which need a technician saves both downtime and unnecessary service calls.
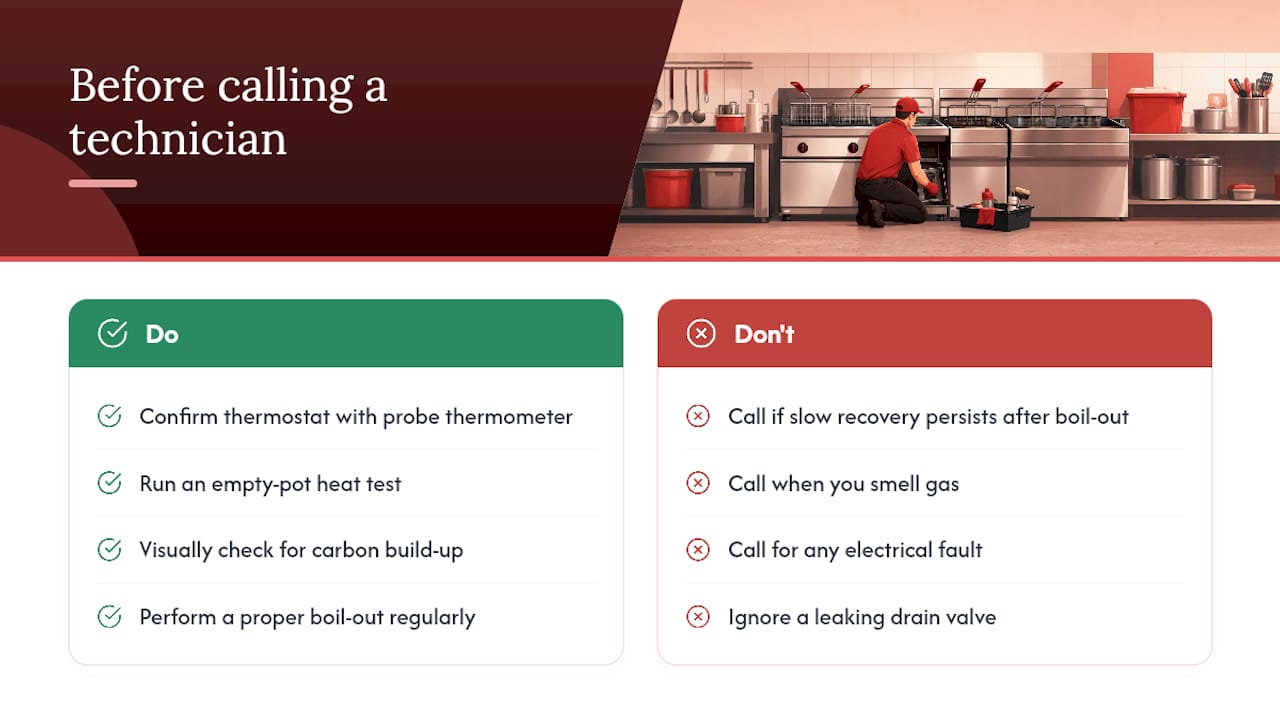
Common symptoms include slow heat recovery after a batch drops in, persistent smoke even after a fresh oil change, oil that darkens far faster than the menu would suggest, and inconsistent temperatures across the vat. Run these quick checks before calling anyone: confirm the thermostat reading against an independent probe thermometer, run an empty-pot heat test to isolate whether the problem is oil-related or unit-related, and visually inspect for carbon build-up or damaged basket seals.
Call a technician when slow recovery persists even after a proper boil-out, when you smell gas, when there’s any electrical fault, or when the drain valve leaks. Carbon build-up on elements often gets misdiagnosed as thermostat failure, when the real cause is an insulating layer of carbonised oil forcing longer heating cycles, and technicians frequently find worn elements or burners are the actual culprit behind persistent recovery problems rather than a simple calibration issue. An annual professional inspection catches worn sensors, degraded burners and loose gas fittings that daily staff cleaning simply can’t detect, and it costs far less than an emergency callout during a Friday dinner rush.
Why preventative fryer maintenance pays for itself
Carbon build-up doesn’t just look bad. It acts as an insulating layer on heating elements, forcing longer cycle times and pushing electricity or gas consumption higher every single service, while accelerating the very oil breakdown you’re trying to prevent. A fryer fighting carbon works harder to hit the same temperature, and that inefficiency compounds daily.
Superior Kitchen Equipment’s fryer ranges are built with maintenance access in mind, models designed for straightforward filtration and cleaning rather than fryers that fight you at every boil-out. The strongest programme pairs daily staff tasks with scheduled professional inspections, and operators evaluating new equipment should also weigh energy-efficiency ratings and available grant support, since upgrading isn’t just about upkeep, it’s about long-term running cost.
Quick deep fryer maintenance checklist
Pin this near the fryer or build it into your shift handover log:
- [ ] Daily: skim during service, filter oil end of day, wipe exterior, check temperature recovery
- [ ] Weekly: drain and inspect vat, clean crumb trays and vents, check drain valve and thermostat
- [ ] Monthly: full boil-out, check gas/electrical connections, deep-clean hood and ventilation
| Log entry | What to record |
|---|---|
| Date | Day and shift |
| Filter cycles | Number of filtrations completed |
| Oil colour note | Light, amber, dark, discard |
| Technician visit | Date of last professional inspection |
An operations manager’s take on fryer upkeep
Small daily habits, not big cleaning days, prevent most fryer failures. The most common pitfall is skipping end-of-day filtration when the kitchen’s slammed, then wondering why oil turns dark within two days instead of five. Log everything, and don’t wait for a symptom to book that annual inspection.
— David
Fryers built for easier maintenance
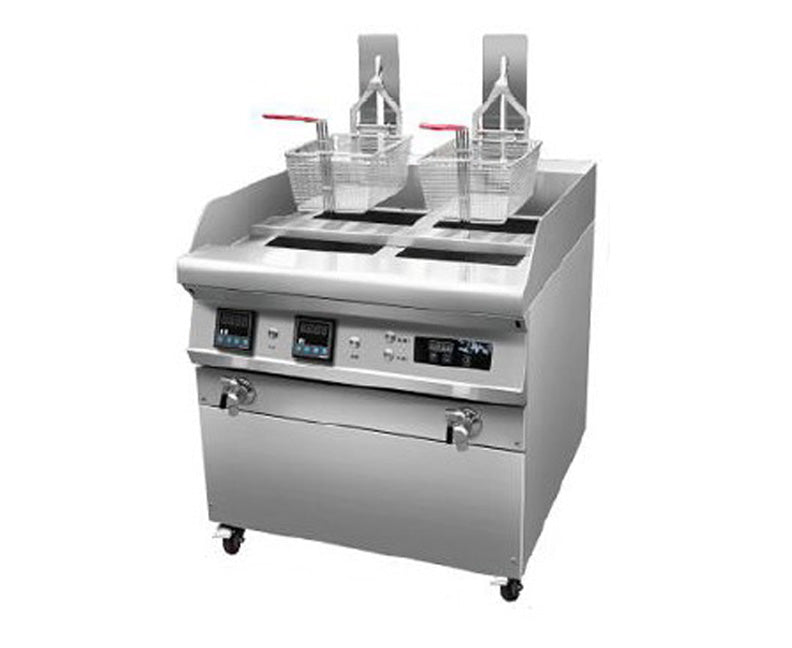
Everything in this guide gets easier with equipment designed for it, and that’s where the right hardware makes a real difference to your weekly workload. The Automated Standing Double Deep Fryer reduces manual oil handling with a split-tank design that simplifies filtration scheduling across high-volume menus.
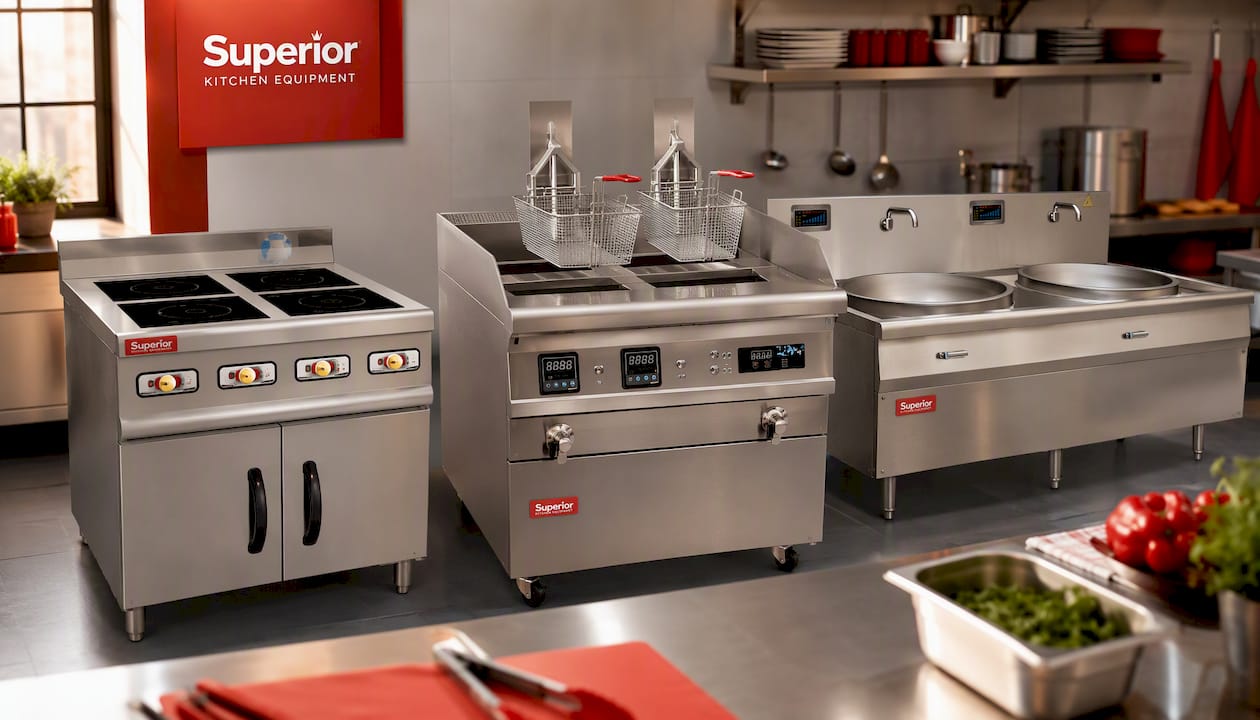
For kitchens weighing gas alternatives, the Heavy Duty Kwali Induction and Standing Induction Cooker cut carbon-related upkeep entirely by removing open flame and grease traps from that part of the line, while offering the energy-efficiency profile that supports grant eligibility for qualifying operators. Before you commit to a boil-out schedule for the next five years, it’s worth checking whether a maintenance-friendlier model changes that equation. Visit the Superior Kitchen Equipment showroom to see these units in person, or request a quote to talk through which configuration fits your throughput and menu.
Sources
For deeper technical detail, consult the deep fryer maintenance checklist, the boil-out cleaning procedure, and food safety planning guidance for documentation practices around deep-clean cycles.
- Deep Fryer Maintenance Checklist | Restaurant Technologies
- Tips for cleaning and maintaining a commercial fryer | Star Food Equipment
- Preventative maintenance for deep fryers | CPS Ohio